It is an enjoyable hobby to learn how people are photographed. Portraiture is a great way to showcase the best features of someone's personality. It also captures a unique quality that makes them unique. Sometimes people are uncomfortable or awkward in their poses, giving their faces blank looks or embarrassed smiles. They are unique regardless of how well-dressed or beautiful they may appear. These are just a few tips to help you capture the essence of your portrait.
Golden hour
Properly done, a golden hour portrait shoot can produce amazing results. The light during this time is perfect for bokeh and can be manipulated to create a variety of different effects. Wide-open shots are great for capturing details and blurred backgrounds. These kinds of shots are very popular with landscape photographers. Listed below are some golden hour portrait photography tips to help you get the best results.
Natural light
It's crucial to consider lighting when taking a portrait. You should consider lighting, not only the background but also the direction and color. A portrait shot with front light is more flattering for the subject than one that uses backlighting. One with backlighting can create silhouettes, blown out backgrounds, or a gray- or blue tone. Use a reflector, or an extra flash to avoid these problems.
Long lenses are best
A long lens for portraits can help you achieve a sense of scale. To get a head-and-shoulders shot in portraits, you might need to stand further back than normal. If you're taking a picture of a child, for example, you may want to try a 300mm telephoto lens for a more realistic look. You can take more intimate images with a 14mm lens, while a longer lens gives your subject a longer head.
Using fill flash
Use fill flash for portrait photography to save backlit portraits. When shooting in Auto mode, the subject's face often appears silhouetted. Your camera perceives the scene as well-lit and exposes your subject accordingly. You can change these settings by turning on fill flash to create stunning portraits without shadows. Here are some tips about using fill flash when photographing portraits.
Communicating with your subject
When you're working on a portrait photography session, communication is one of the most important skills you can learn. Communicating is crucial to the success and enjoyment of your portrait photography session. Your subject's body language can have a huge impact on how they pose, so it is important that you learn how to interpret it. Here are some tips that will help you communicate effectively with your subject.
FAQ
Which Lenses Do I Need?
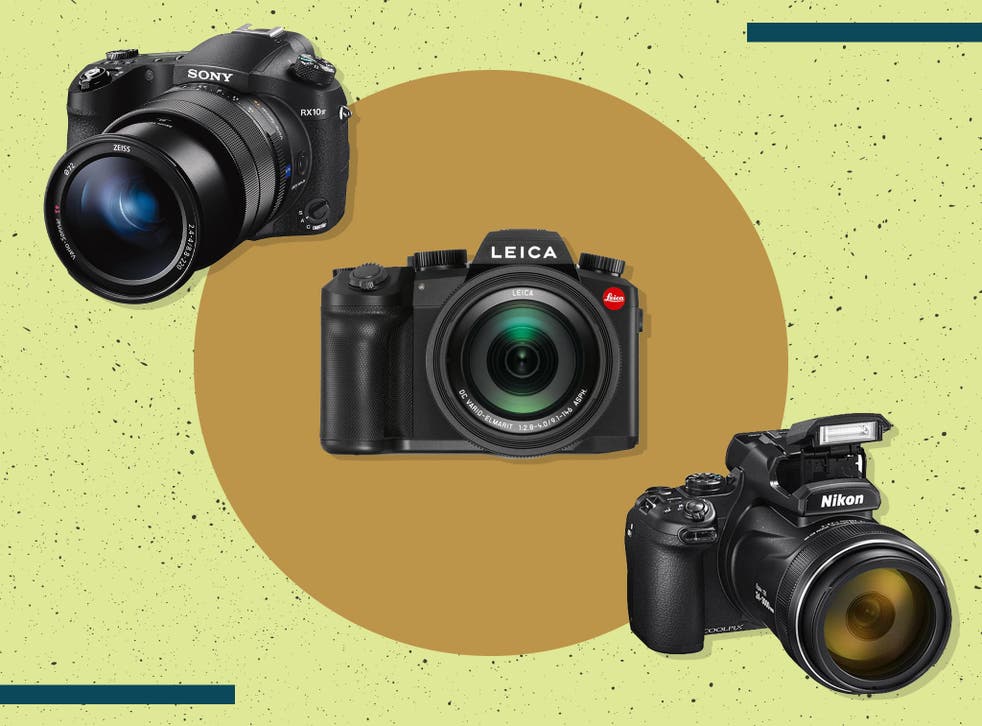
Beginners often ask, "What lens should I purchase?" It's a tough decision since there are so many options available.
The good news is that you don't necessarily need to buy a new lens every time you purchase a new camera. Instead, you can add lenses later on.
These are just three options for lenses that you might consider.
-
Wide Angle Lens (14mm-24mm): These lenses have a wide view angle that will allow you to capture more of your subject. You can zoom in, but not lose image quality.
-
Normal/Standard Zoom Lens (28mm to 70mm) : These lenses allow you the flexibility of changing focal lengths, while still maintaining high quality images.
-
Telephoto Zoom Lens (70mm to 200mm): These lenses make it easy to capture distant subjects. These lenses let you focus on the subject even if they are small.
These lenses can also be combined to produce different effects. Combining lenses can create different effects. For example, a normal lens could be used to capture small details while a telephoto lens is used to capture faraway objects.
Do I Need A Tripod?
This is a question everyone asks. A tripod isn’t always needed, but it can be very useful.
It helps you keep your camera steady while taking pictures at slow shutter speeds. A tripod can make all the difference when you're photographing landscapes or other stationary subjects.
On the other hand, if you're photographing moving subjects such as sports or people, using a tripod can cause blurriness. What are the best ways to determine which situations you need a tripod for?
A tripod is useful for any situation where you want to photograph fast action or stationary subjects. Examples include:
-
Sports
-
People
-
Landscapes
-
Close-ups
-
Macro shots
Do this test to see if you are unsure if you require a tripod. Look through the viewfinder with your camera steady. A tripod is required if there are blurred lines, movement or other issues.
If there isn't blurring you won't notice any benefit from adding a tripod.
These tips will help you make the right decision about whether to invest in a tripod.
-
Your tripod should have smooth legs. This will prevent unwanted vibrations from shaking your lens.
-
You should choose a sturdy tripod. Some tripods are made of plastic, so they may not be as durable. Opt for a sturdy metal tripod.
-
A remote release is a great option. This lets you control your camera remotely. The button can be pressed to activate the shutter.
-
Look for a tripod that has a 360-degree rotating head. This makes it much easier to position your cameras horizontally or vertically.
-
Keep in mind that tripods aren't cheap. Expect to pay around $100-200. You'll still get a lot for your money.
-
Don't forget about accessories like filters and memory cards.
-
Before ordering online, you should check in your local shops. Many retailers offer free shipping.
-
Read reviews to determine what customers think about a particular product.
-
Ask friends and family members who own similar products.
-
Visit forums and message boards to learn about customer experiences.
-
User reviews can be found online.
-
Amazon.com makes it easy to compare prices and see customer feedback.
-
Check out these photo galleries for an example of the work that photographers do with their tripods.
Light Room can be used to enhance your photographs.
Start early to get the best photos possible for your project. It's always a good idea to take as many pictures as possible and then decide which ones will be the most valuable.
This is possible because Lightroom lets you see how different settings affect each image. These settings can be adjusted on the fly without having to go back into Photoshop. This allows you to quickly test what looks great and what does not.
Should I take up photography as a hobby or a profession?
Photography is an excellent way to capture memories and share them with friends and family. Photography also lets you learn more about the world around.
There are many resources online that will help you take better photos if you're interested in this topic.
You might also consider enrolling in classes at nearby community colleges or art schools. This will enable you to make connections with other photographers who are able to give valuable feedback.
How do I look beautiful in photographs?
Photographing yourself is the best way to make sure you look professional in your photos. You'll learn how you pose for the camera and which angles are best. You will also learn to use lighting and props as a way to enhance your natural beauty.
You'll learn how to find clothes that fit and make up that looks great on your skin.
We'll also show you how to retouch images with Photoshop or other editing software if you aren't satisfied with the results.
You can now take self-portraits.
Statistics
- There are people out there who will pick at flaws they can only see in 100% crops of your photos. (wikihow.com)
- That's the easiest way to get blurry photos 100% of the time. (photographylife.com)
- In this case, 100% of readers who voted found the article helpful, earning it our reader-approved status. (wikihow.com)
- The second easiest way to get blurry photos 100% of the time is to use a cheap filter on the front of your lens. (photographylife.com)
External Links
How To
How to take photographs in low lighting conditions
Low-light photography is the art of taking photographs in dark or dimly lit environments. This requires special equipment and techniques. Controlling exposure, white balance, sharpness, and contrast are the main challenges. There are two kinds of low light photography. Flash photography is best when there is enough light. However, if there's not enough natural light around you, you'll need to use flash. Without a flash, it is possible to get a poor picture if the subject is indoors and not outdoors. You can also shoot at night when the moon is shining. This way, you'll get some nice colors and shadows. Another option is taking photos at twilight. Twilight happens when the sun has set but there is still daylight.
Long exposures may be something you want to explore. Long exposures can be used to capture images even if the shutter has been closed for several minutes. When the shutter remains closed, the camera records only light that falls on the sensor. This light will continue to fall onto your sensor after a long exposure. The shutter was not opened, so no new light entered the lens. This means that you will not see any movement. You can ensure clear images by turning off automatic settings such as autofocus or autoexposure. You should also adjust the ISO setting prior to you start taking photos. A 200 ISO setting gives you greater control over how dark or bright your image looks. Once you are ready to click the shutter button, make sure it is fast. The shutter will close completely. You should then hold down the shutter button for as long as possible. You will prevent additional light from entering your camera by keeping the shutter button down. Once you have taken the image, wait for a few seconds before you release it. This will allow the camera to process your image. While your image processing is taking place, you will be able to view your photos on your screen. Save them once you are satisfied with them.